Showing posts with label chocolate. Show all posts

Wednesday, November 11, 2015

Chocolate Ganache- Stuffed S'mores Donuts

Happy Wednesday! Hope you are having a wonderful week so far!


We're still enjoying rather curious weather here in Arizona. Up North, where my family lives, and even further North in Flagstaff have been graced with beautiful snow. Here, one day it's a Sunny day, the next day rainy, and then we get a combo of both, but rather windy.


Two weekends ago, my daughter Katelyn had a school project about the Revolutionary War, where she had to camp out, and write about her experience. So we pitched our tent out in the back yard, and then we made a makeshift, MacGyver style grill out of a Dollar Store roasting pan, and a cooling rack, and roasted hot dogs, and it wouldn't be a proper camp out without S'mores. 


Then last Saturday my husband asked me to make doughnuts! I've never made doughnuts from Scratch, and I am a little intimidated to fry anything. 
Then it came to me, I remembered my review of Adam Sobel's Street Vegan, and that there was a whole delicious chapter dedicated to doughnuts, and how I was wanting to give making doughnuts a go, so I perused the chapter, and found Stuffed S'mores Doughnuts. 
As I mentioned before, we are not Vegans, and I didn't have the ingredients listed that he used in his recipe, so I switched out what I did have on hand, like milk and real chocolate chips.
I have to say, reading his instructions from start to finish, making the doughnuts is seriously easy, and the kids had fun cutting out and stuffing the doughnuts! It made for a fun weekend treat!

Stuffed S'mores Doughnuts (adapted from Adam Sobel's Street Vegan)
(makes 12 doughnuts)

For the Chocolate Ganache: 

1/2 cup of milk
1 1/2 Tbls. agave nectar
 (or you can use another natural sweetener)
1 cup mini semi-sweet chocolate chips

For the doughnuts:

1 cup milk
1/4 cup canola oil 
{plus more for frying doughnuts}
2 1/2 tsp. active dry yeast or 1 packet of yeast
2 1/2 cups all purpose flour
1/4 cup agave nectar
1/4 tsp. salt
1/4 tsp. baking powder
1/4 tsp. baking soda

Mini Marshmallows 
and
1 cup smashed Graham crackers
for stuffing

For the Chocolate Glaze:

1/3 cup sifted Dutch-process cocoa powder
3 cups powdered sugar
1/3 cup milk

1. Make the Ganache: In a small saucepan over medium heat, bring the milk and agave nectar almost to a boil. Place the chocolate chips in a heat proof bowl. Just as the milk starts to bubble, pour it on top of the chocolate chips, and whisk together until the chocolate chips have melted and the mixture is smooth. Chill the ganache. He suggests 3 hours, I placed it in the freezer for 20 minutes. You can store it in an airtight container in the refrigerator for up to 10 days.

2. Make the dough: In a medium saucepan, over low heat, warm the milk, agave nectar and oil to 95F. Pour the warmed milk in a large bowl. Sprinkle the yeast over the milk, and let set for 5 minutes for the yeast to grow. When the yeast has foamed up, add the flour and knead together on a floured work surface for a minute or two, until the dough is smooth. If it is still a little sticky add a tablespoon of flour. Place the dough in a medium bowl and allow the dough to rise, covered for an hour, until the dough has doubled in size.

3. Make the doughnuts: Lightly dust a baking sheet and a work surface with flour. On the floured work surface roll the dough out into 1/2 in thickness. I still don't have a 3-in biscuit cutter, I used one of our drinking glasses, and transfer the circles of dough onto the floured baking sheet. Reroll any scraps of dough to cut out more doughnuts. Set the doughnuts in a cold oven to proof them, by placing a small saucepan of steaming water with them for 25 minutes. Keep the oven door shut....No peeking!

4. Make the chocolate glaze: In a small bowl, whisk together, the cocoa powder, powdered sugar, and milk. The cocoa powder, may not want to blend right away, you could warm the milk slightly to take the chill off, seems the blending go more smoothly.


{I was intringued at the center}

5. Fry the doughnuts: I used my cast iron skillet....Filled it with 2 inches of canola oil and heated it on medium-low heat {360F}. I fried two at a time, until they were golden brown on each side about a minute or two. Transfer the doughnuts to a cooling rack.

6. Fill the doughnuts: Once all the donuts are fried, and the kids loved this part, they pinched out the middle of the doughnuts to make a well in the center of each donut. Glaze the top of each dout with chocolate glaze. Then stuff them with a Tbls or two of the chocolate ganache, followed by mini marshmallows, sprinkle with crushed graham crackers, and mini chocolate chips. My husband wasn't home to use his butane torch to toast the marshmallows, {you can skip toasting the marshmallows, if you don't have one}!

Enjoy! Here I saved you a couple to try!


Until next time! 
Have a fantastic rest of your week!


Sharing at these Parties!
 You can follow me here!

Twitter | Bloglovin | Google+ | Facebook Pinterest

Thursday, October 29, 2015

Chocolate Sour Cream Bundt cake with Cheesecake filling

Can you believe that October is almost over,
 and Halloween is just a few days away?

So far this week has been going fine, 
Katelyn has a school dance on Friday,
oh, wish my husband good luck
he's having his wisdom teeth out Friday, 
and Josh gets to pass out the candy on Halloween!
He's actually looking forward to it
{not the wisdom teeth extraction, the passing out the Treats}!


Onto today's recipe, if you are one of the tens of people that read my blog, especially
in February for Valentines Day, then you know how much I love chocolate, and after all 
the Valentine's Chocolate, I made a chocolate strawberry cake,
and Easy Dark Chocolate Nutella brownies,
all in the same week, I was this close to saying how I'd had enough chocolate. 
What was I thinking! You can never have enough chocolate!

And here we are, approaching another Holiday, where we
giveaway chocolate, and then spend the next couple of weeks, 
{or days} enjoying it!

This past weekend, as I was getting over a cold,
and finishing up painting my daughter Katelyn's room for the 
ORC, {the color just happens to be Valsper's Dark Truffle}
it didn't occur to me, that after reading Carlee's comment,
that it might have been my cold,
because the paint smelled like chocolate.
I almost considered licking the wall to find out, but then
thought that would be gross, and decided to bake a cake instead!


A quick story, I went to a thrift store, it's next to my favorite book store,
and I as I pass by the china, and stem wares, I came upon my first brown Ironstone
set, but I was disappointed, because it had been picked to pieces, rather than
someone buying the whole set! I would have gotten the dinner plate, but it had 
a huge crack down the side, and it was the last one. 
There was however, a small saucer left, and I've been wanting to take a picture 
with something on it, so this prop came at the perfect timing.

Here's a great tip, if you need to find props for your photos, but 
you don't have a ton of money budgeted.
Go down and peruse your local thrift store, 
you'd be surprised at what you could find!


Back to the recipe, I promise not to go off the subject,
one of my new favorite blogs is  Shutterbean,
and if you get a chance check on over there,
she has the most prettiest of everything 
you possibly could imagine for inspiration.
Or check her out on Instagram!

I was looking for a chocolate bundt cake recipe, and
her recipe was exactly what I was looking for!
The recipe she found was from 


The icing was perfectly glossy, the cake looked super moist, and not too dense.
She even tempted me with a bite!
I was hooked!
So for today, I'm taking on her recipe, and adding a twist,
because I love my bundt cakes filled, 
especially when they are filled with cheesecake!!

Chocolate Sour Cream Bundt cake with Cheesecake filling (adapted from Shutterbean)

For the cake
  • 1 cup (2 sticks) unsalted butter, plus more for the pan
  • 1/3 cup unsweetened cocoa powder
  • 1 teaspoon  salt
  • 1 cup water
  • 2 cups all-purpose flour
  • 1 3/4 cups sugar
  • 1 1/2 teaspoons baking soda
  • 2 large eggs
  • 1/2 cup sour cream
  • 1 teaspoon pure vanilla extract
For the glaze
  • 4 ounces unsweeted chocolate, finely chopped
  • 1 1/2 tablespoons agave nectar (or corn syrup)
  • 1/2 cup heavy cream
  • 1 1/2 tablespoons sugar
For the Cheesecake
  • 8 oz. cream cheese
  • 1 egg
  • 2 tsp. flour
  • 1/2 cup granulated sugar
  • 1 tsp. pure vanilla extract
Make the cake:
Position a rack in the center of the oven and heat to 350 degrees. Butter and flour a 10- or 12-cup Bundt pan and set aside.
In a small saucepan, combine the butter, cocoa powder, salt, and water and put over medium heat. Cook, stirring, just until melted and combined. Remove from the heat and set aside.
Put the flour, sugar, and baking soda in a large bowl and whisk to blend. Add half of the melted-butter mixture and whisk until completely blended (it will be very thick). Add the remaining butter mixture and whisk. Add the eggs one at a time, whisking each to blend completely before adding the next. Whisk in the sour cream and vanilla until smooth.
Make the Cheesecake filling, using a stand up mixer, blend the cream cheese, sugar, vanilla, flour and egg in a mixing bowl until well blended.
Pour 2/3 of the cake batter into the prepared pan, and then layer the cheesecake filling in the center, top the cheesecake filling with the remaining cake batter, and bake until a toothpick inserted into the center of the cake comes out clean, 55-60 minutes.
Let the cake cool in the pan for 15 minutes and then invert onto a rack. Let cool completely before making the glaze.
Make the glaze:
Put the chopped chocolate and agave nectar in a medium bowl and set aside.
Combine the heavy cream and sugar in a small saucepan and put over medium heat. Stir constantly until the cream is hot and the sugar is dissolved. Pour the hot cream over the chocolate and whisk until melted and smooth. If it’s very runny, let it sit for a minute or so to thicken. Drizzle over the cake.


As always, I saved you a slice!
Wishing you a beautiful weekend, and
a Happy Halloween!
Until next time! xo,
Sharing at these Parties!
 You can follow me here!

Twitter | Bloglovin | Google+ | Facebook Pinterest


Thursday, October 1, 2015

Spooky Black Widow Martini and Cupcakes

Happy Thursday friends! Hope your weeks are going great! Getting into the Halloween Spirit, I have to share with you something that just sends a chill up my spine, are not just spiders, but the very dangerous and deadly Black Widow. She creeps and crawls, closer and closer to your heart, and then
just like that she...Wait. thank goodness you're not a male spider, or she would eat you alive!!

I couldn't resist both these fun recipes!


The first is for the Black Widow Martini.
 It sure carries a sting and a seriously delicious Chocolate Orange flavor!
 Made with Vanilla and Chocolate Vodka, Kahlua and Grand Marnier,
it is sure to Party Pleaser!


The second recipe is for my Black Widow cupcakes.
Ever since I can remember Almond Joys have been candy of choice!
Now it's my turn to take a bite out of a Black Widow,
made with Coconut Almond cupcakes, Almond Joys, whipped Chocolate Ganache, 
and Black Licorice.


For the Martini (Makes 2):
First chill a Martini glass. Run a lime around the edges. 
Coat edges with Red Sugar crystals.

In a Martini shaker, pour 
4 oz. cold espresso
2 oz. Vanilla Vodka
2 oz. Kahlua
1 1/2 oz Chocolate Vodka
1 1/2 oz Grand Marnier 
Shake to combine. Pour into martini glass.


For the cupcakes: (adapted from Life,Love and Sugar)
1 2/3 cup all purpose flour
1 cup granulated sugar
1/4 tsp baking soda
1 tsp baking powder
3/4 cup unsalted butter
3 egg whites
1/2 cup Greek Yogurt
1/2 cup whole milk
1 tsp. pure vanilla extract
1 tsp. almond extract
1 tsp. coconut extract

1. Preheat oven to 350F. Line muffin pan with cupcake liners.
2. Cream butter and sugar. Scrape sides of bowl down.
3. Add egg whites, one at a time and beating each until well blended.
Do not over mix.
4. Scrape bowl down. Add extracts and yogurt.
Mix until blended.
5. In separate bowl, mix together flour, baking powder and baking soda.
6. Add half of the flour mixture to the butter mixture.
7.  Mix until blended. Scrape sides down.
8. Add milk and remaining half of the flour mixture. Mix until well blended.
9. Spoon into cupcake liners a little more than half way.
10. Bake for 18-22 minutes.


For the Icing:

I used the Whipped Chocolate Ganache recipe from my Harvest Carrot Cake.
Using (affiliate) Wilton ColorSwirl 3 Color Coupler, 411-1992 ,


I divided the Icing into 3 equal parts.
1 I tinted Black
and
1 I tinted Red,
Keeping one the original Chocolate Ganache.

Then on top of the Cupcake I added a Snack Size Almond Joy, used Black Licorice for legs.
If you can find the Twizzlers Pull Apart Black Licorice.
Finally, I added Red Sparkle Gel for The Black Widow's Diamond of Death!


Here I saved a cupcake for you!
Take a Bite if you Dare!
(insert spooky laughing out loud)

Until next time!
xo,
Christine

Sharing at these Parties!

made in a day


Thursday, September 24, 2015

Harvest Carrot Cake

Hi Friends, and Happy Thursday!
Wow how this week is flying by!!
 Have you ever had one of those days where you desperately want to finish something,
and then all of these un-called for things happen, and
 you struggle to finish the thing you were wanting to finish.


That's how I felt about baking this cake.
First, I got a call from the school to pick my son up, drive down there, but
then I couldn't pick him up, and then I realized I forgot the canned pineapple.
An hour later, just as I started to bake the cake,
I get another phone call to pick him up, and did.
On the way home I picked up the canned pineapple,
put the cakes in the oven, by this time,
 it's time to pick my daughter up from school,
 get home, clean up the flour and carrot peeling mess,
 Go to start the chocolate frosting, and
realized I just used all the butter for the cake.
Ugh!


 Finally, I let the cakes cool, take my son to the dentist,
 and on the way back I pick up more butter!
 This is turning out to be one of those days, at least,
 on a positive note, my oven or mixer didn't break,
or anything else for that matter, so that's a good thing.

Back to the cake, the other day while standing in the check out line,
this photo a cake grabbed me, and
I just had to pick the magazine up!
It looked like a chocolate cake with
an orange spiderweb draped across it. The magazine recipe calls for melted marshmallows, I used melted white chocolate tinted orange

The cake could have been a yellow cake, or a chocolate cake,
but No
it was a Carrot Cake with Chocolate frosting!

I am so used to seeing Carrot Cake with Cream Cheese frosting in the Spring,
why not Chocolate frosting for in the Fall!
In fact this is going to be my go to recipe for both!
The cake was super moist and not too dense or too light, just perfect.
Talking about chocolate, this is a chocolate lovers dream come true!
It was perfectly rich, and creamy, and very easy to spread!
If you are looking for a Holiday dessert to make,
then you really need to try this one!

Harvest Carrot Cake with Whipped Chocolate Ganache Frosting

For the Chocolate Ganache frosting:

1 stick of butter
12 oz of semi sweet chocolate chips
1 cup of  heavy whipping cream
1/2 cup powdered sugar

For the Carrot Cake: (adapted from Mommy On Time Out)

2 1/4 cups all purpose flour
2 tsp. baking powder
1/2 tsp. salt
2 tsp. pure vanilla extract
1 tsp. pumpkin pie spice
1 cup crushed Dole pineapple, undrained in own juice
3/4 pound of shredded carrots (about 7 or 8)
1/2 cup of chopped pecans
4 eggs
1 cup of unsalted butter
1/4 cup applesauce
1 1/2 cups granulated sugar
1/2 cup packed brown sugar (light or dark)

Instructions:

1. Preheat oven to 350F. Grease 2- 9in round cake pans.
2. In a stand up mixer, cream butter and both sugars, until light and fluffy.
3. Add one egg at a time, and mix until well blended. Scraping down the sides of the bowl, after each egg is added.
4. Add vanilla, and mix in pineapple, applesauce, pecans and carrots.
5. In a separate bowl, combine flour, baking powder, salt and pumpkin pie spice.
6. Add half the flour mixture to the carrot batter, mix until well blended. Scrape down the sides of bowl, and repeat with the other half of the flour mixture.
7. Divide the cake batter between the two cake pans. Bake for 35-40 minutes, until the sides of the cakes pull away from the sides of the pans, the top of the cake springs back when lightly touched, or  using a toothpick insert into cake, and if it comes out clean, then the cake is done.
8. Allow cakes to cool completely before frosting.

For the Frosting:

1.) While the cake is baking, in a medium sauce pan, over low heat, warm the cream, and butter. Do Not Boil! Only heat the mixture until the butter melts. Then add the chocolate chips.
2. Stir until the mixture is well blended. You can either set aside the frosting to cool completely for 2 hours, or I stick mine in the fridge for 20 minutes until it is just about cooled.
3. In a stand up mixer, begin to beat the chocolate frosting. On low setting add the powdered sugar, until the frosting has thickened, becoming nice and creamy, and very spreadable.

Decorating:

Melt 6 oz of white chocolate. DO NOT BOIL or you will burn the chocolate. Add 1 to 2 Tbls. of milk. Stir until blended and creamy. To make orange chocolate, add 4 drops of yellow, and 2 drops of red. I used a small plastic bag, and cut the corner off to make a very small decorating tip, or you can use Wilton's tip #2. The chocolate will get hard when it cools, so you will need to work quick, or keep reheating the chocolate slightly, being careful not to overcook the chocolate.


As always I've saved a nice big slice for you!

Until next time!
Enjoy the rest of your week!
xo,

Sharing at these fabulous parties!


Friday, August 7, 2015

Follow Friday #31: Having Fun in the Summertime

Happy Fri-Yay! I'm so happy you came to visit me today! As busy as a week  as it's been here with Back to School, my children are finally all settled in. I'm back to finishing up painting a couple of projects that have been in the works. This weekend, I would like to finish one of them. Also this weekend, a new natural foods store is opening in Scottsdale, and I am going to the Grand Opening as well as get my haircut, and attend my first Milk Painting class. I am so glad it's Friday, I'm really looking forward to this weekend!

 For Follow Fridays from now on, I will be featuring 4 different blogs, one cooking/baking, one gardening, one décor/style, and one crafting


Dark Chocolate Peanut Butter S'Mores Skillet Cookie from FreshMommy

Ok, I like S'mores, and the fun, fond memories of camping and roasting marshmallows over a campfire, BUT I love dark chocolate, and peanut butter. Better still, making S'mores at home!

Twitter     Facebook     Instagram     Pinterest     Bloglovin


Hanging Garden Basket via A Beautiful Mess

I've seen these baskets, so many times, they've been calling to me, everytime I pass them when I'm at HomeGoods, but didn't know where to put them or how to use them. What a clever idea to use them as Hanging gardening baskets.

Bloglovin     Pinterest     Instagram     Facebook     Twitter


Montana in Stripes via Hey, Shenanigans!

Instagram    

She's a new lifestyle blogger for me. I love her blog already. She's fun, she loves peonies, loves to travel, and has a husky (we have 3) with two colored eyes!


Summer Themed Coastal Photo Display  via Hymns and Verses

When I saw this beautiful gallery wall, I knew I wanted to recreate something like this. You'll find this and other ways to bring the beach home in this article
 
facebook     Pinterest     Instagram       G+       Twitter
 
 
Wishing you all a fun weekend!
Until next time!!
xo,


Thursday, July 30, 2015

Dark chocolate, Caramel- Sea Salt Skillet Brownies with Pecans

Happy Day before Friday! Hope you are all enjoying your Summer!
Ours is coming to an end
with the kids going back to school this coming Monday!
Where did the Summer go??
The girls and I are finishing up Katelyn's dresser,
an updated post is soon to follow!
Today I wanted to share with you something that has been a long time coming. My father and I had several things in common. My favorite past time when I got a little older was, over our morning coffees, we'd finish the daily crossword puzzle together. It was his love of reading that I really miss! He'd always have a book in his hand! What I remember most about my dad was
 his love for his cast-iron skillet!
 That was his baby!


To be honest, I don't remember my mother ever using it!
He'd make us one of his famous ham and cheese omelets in it!
Confession time....
I've had one, I just never use it!
That is until, I had this need for chocolate!
 It's been a busy couple of weeks,
and I haven't really made anything sweet, since the
A few other family things have been going on in the background,
my grandparents' health are declining, and
I worry about my oldest daughter being so far away from home!
That brought me back to thinking about my father!
How he was there for me when ever I needed to talk
or just be. There were some days, we would just drink our
coffee and do our cross word puzzle in peace 
without ever saying a single word.


My Daddy has been gone almost twenty years now!
 If you still have your father with you,
 give him a hug today and tell him you love him!


Holding that skillet in my hand felt pretty darn good!
A peace came over me,
or maybe it was the thought of the ooey-gooey
of that perfect dark chocolate brownie fix.
Either way, this skillet is going to be used
much more, but right now
it's baking brownies!

Dark Chocolate, Caramel-Sea Salt Brownie Skillet with Pecans (adapted from MidWest Living)
Ingredients

1 1/3 cups packed light brown sugar
1 cup all purpose flour
1/2 cup unsweetened cocoa powder
3/4 tsp baking soda
1/2 tsp salt
1 cup pecans, coarsely chopped
1/4 cup butter, unsalted
1/2 cup packed light brown sugar
1/2 tsp. sea salt
1/2 cup heavy whipping cream
2/3 cup unsalted butter, melted
4 eggs, lightly beaten
1/4 cup heavy whipping cream
6 oz dark chocolate chips
Vanilla ice cream (optional)
Directions
1. Preheat oven to 325F. Heat a 10x2-inch cast-iron over medium-high heat.
Toast chopped pecans in skillet for 2-3 minutes, until lightly toasted.
2. In a mixing bowl, combine the brown sugar, flour, cocoa powder, baking soda and salt.
3. To the pecans, add the butter and brown sugar. Just as the brown sugar is almost melted, and the butter starts to bubble, add the 1/2 cup heavy whipping cream and the sea salt. Stir until the caramel is well combined, return to heat until the brown sugar is completely melted, and then remove from heat.
4. To the flour mixture, add the melted butter, eggs, heavy cream. Fold in the dark chocolate chips.
Spoon over the pecans and caramel.
5. Bake in oven for 35-40 minutes. Serve warm with vanilla ice cream.
As always, I saved a slice for you!
Sharing this at these Fabulous Parties!
You might also like my recipe for
Nutella Brownies
If you are looking for more Brownie Loving recipes, check out this
Until next time! Have a wonderful weekend!
xo,
 

Monday, June 29, 2015

A Week in CASL Photos: June 22- June 28

Happy Beautiful Monday! Hope you all had a relaxing weekend! I was so excited this weekend, we got a couple storms that came our way! Sadly, I didn't see any rain, but it looked like it sprinkled in the middle of the night! Thank god for the cooler temps, even if it's only 6 or 7 degrees cooler. This weekend, I am looking forward to going up and seeing my family for the 4th! I'm making ice cream today, and the girls are making cupcakes! My sister in law and I , must think alike, because for Christmas we both bought my daughter a Baby cakes maker. Which is awesome because, my daughters now each have their own!

What I like about doing a Photo365, is that I get to share with you a peek into what my week has been like, and possibly a sneak peek to what next week will bring. I've tried 365 Photo or Daily photo memes several times before, and surprisingly, I am getting farther posting my photos once a week, instead of once a day. It makes a big difference, and it's really nice to look back and see a slice of my day!

June 22- In my garden- My cherry tomatoe plant and my Vincas seem to love this heat wave! Thank goodness, I can feel the monsoons approaching. We had a storm watch warning last night! Things are starting to cool down.


June 23- Gift...I found these fun, colorful letters at Home Goods for the girls' rooms!

 
June 24- View...This is a photo my oldest daughter took up in Washington. Not only do I love the view of the docile doe, but the ever green forest, instead of rocks and cactus!
 
 
June 25- Mini...Love me some mini Chocolate Chips!
 
 
June 26- Animal...This is Her Highness Ruby! She's getting up there at 12 years old, but still the sweetest kitten ever!
 
 
June 27....Peaches...I must have been a Southern girl in another life...I love sweet tea and peaches!
Be sure and check back on July 1st to see what I make with these sweet beauties!


June 28- Orange...One of the prettiest roses in my garden!
 
 
Are you on Instagram? You really should be!! 
You can follow me here on Instagram
 
   I recently started following a photo a day prompt on #fmsphotoaday.
 Let me know if you decide to join in the fun!

Have a great rest of your week! Until next time!
xo, Christine
 
Want to stay connected & up to date with Cherishing A Sweet Life?
 Don’t forget to follow on FacebookPinterest
  

Saturday, June 27, 2015

Street Vegan by Adam Sobel & Raw Raspberry Chocolate Tart

Hope you are all relaxing this weekend, or
 out there enjoying some Summertime fun!


Do you love doughnuts? Very random I know, but we will get to that In a bit, but first today, I am excited to share with you a fascinating cook book, "Street Vegan"! For an omnivore like myself, I have always been intrigued by the idea of someone not wanting to eat meat. And I've always been that mother who has told her children, "Don't knock it, until you try it"! (unless it's okra)


When my oldest daughter decided she wanted to be vegetarian, almost five years ago, my husband and I were concerned, that she wouldn't receive  the protein she needed for her body. On her 18th birthday she chose 'The Green Vegetarian', for her birthday dinner. My husband ordered the BBQ chicken sandwhich. He almost spit out his sandwhich when told him it wasn't chicken. My favorite meal with her was at 'Pita Jungle', when she took me out to lunch with her first pay check. As I was taking my nutrition classes, I began to understand more about protein intake, and how much we really do need. Then it wasn't so much the amount of protein that she would be getting, but the vitamins and minerals. Again, she showed me, that she was able to eat healthy if not healthier as a vegan.
 
Another interesting concept of Vegetarianism, is the idea of only consuming food in 'Raw' form. The first time I read about eating only a raw diet was from this women, Karyn Calabrese, and her story of why a plant based diet is more beneficial for our health. The first time I saw a slice of her "Raw" cheesecake, I was seriously intrigued. Don't get me wrong, I love me some real cream cheese, cheesecake, but what made her cheesecake so different that I wanted to try it?
 
This is why I got excited to review 'Street Vegan', raw pie recipes, including a 'raw pumpkin' one for the Holidays to try! What I loved about reading the book, were not only looking at the incredibly delicious photos, but this quote from Adam Sobel,  
"I don't make food that pretends to be something it isn't-just food that's overwhelmingly made with love and with intentions to make the world a more blissful, peaceful place"
Adam Sobel, had a dream to start a Vegan Food Truck, "The Cinnamon Snail", and turned it into a successful business, with people waiting not only in lines, but in the zero degree, bitter winter cold, to get their hands and mouths on his food.
 
 (affiliate link)

Author: Adam Sobel
 Paperback: 272 pages
Product Dimensions: 7.5 x 1 x 9 inches

It is the
#1 cookbook for 'Raw' cooking
#5 cookbook for baking (you'll see why)
#13 cookbook for Vegan
 
 
3 Things I liked about this book:
 
  • The cookbook is divided into 10 sections, and there is one section completely devoted to 'Doughnuts'. When I saw that I jumped right too it, and there are recipes not just for ' BingCherry Fritters', but Cinnamon Apple and Blueberry-Pine Nut ones. This is the one I really can't wait to try, "Mexican Hot Chocolate Glazed Twists". If you wanted to try your hand at making doughnuts, he explains thoroughly the process of making doughnuts from the beginning, taking flour and leavening ingredients to twisting and frying techniques.
  • My second favorite section is the soup section. I am always looking for something out of the ordinary to try, so when my daughter had strep throat and my husband had a dental emergency I made Ginger Laphing vs. Chicken Noodle soup. Other recipes include, Red Wine Minestrone, Cheesey Broccoli Beer Soup, and Maple Butternut Squash Soup. I really like how he denotes recipes as Gluten Free
  • A word on the Sandwhich section, the photos are truly mouthwatering, and even my husband who has no idea what Seitan is, really wanted to try the 'Thai Barbecue Seitan Ribs'. In the introduction, Adam lists items in his Vegan pantry. With his recipes, there are in my opinion some exotic ingredients, like Umeboshi Plum Vinegar I still haven't found, along with other ingredients, where I can see his point of view, they are the best and bring out the best flavor, but not all of us have these in our pantries. That is what I like, is being exposed to new flavors, new ingredients, to tempt my tastebuds. 
To read more review about Street Vegan at Amazon via the picture link below.
 
 
Raw Raspberry Chocolate Tart (tweaked a little from Adam Sobel)
 
 
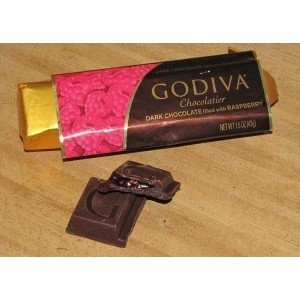
If I hadn't already known that this wasn't a real cheesecake, I would have had absolutely no idea in the world it was a faux one! One bite, and I thought I was enjoying the most decadent chocolate cheesecake, that reminded me, that I was eating a Godiva Dark Chocolate with raspberry bar, that's how amazingly delicious this Raw Raspberry Chocolate tart is. Not forgetting the flavors, the raspberry-orange sauce, really enhances the chocolate with the hint of sea salt, bringing out the dark chocolate flavor even more.
It was also good for me, because I wasn't conscious stricken for eating this guilty pleasure.   
My children ate it, and the only negative comment I got was from my son, who apparently doesn't care for dark chocolate. Weird, I know, but I still love him. All kidding aside. A celebratory slice of raw raspberry chocolate Tart, is in order.
 
 
For the raspberry sauce:
 
12 oz. of raspberries
the zest and juice of one medium lemon
2 Tbls. pure agave nectar/ pure maple syrup ( I bought it at Trader Joe's)
1/4 tsp. sea salt
 
for the chocolate-almond crust:
1 3/4 cups raw almonds
1/4 cacao powder
1/4 tsp. sea salt
1 tsp. pure vanilla extract
3 Tbls. pure agave nectar/ maple syrup
1 Tbls. melted coconut oil
 
for the raspberry- chocolate filling
2 2/3 cup raw cashew pieces, soaked in water for 30 minutes
2/3 cup agave nectar/ maple syrup
1 1/4 cups melted coconut oil
1 cup cacao powder
 2/3 cup fresh raspberries
1 tsp. pure vanilla extract
1/4 tsp. sea salt
 
Mini chocolate chips for garnish (he used cacao nibs)
 
1. The raspberry sauce: Puree together the raspberries, orange zest and juice, salt, and agave nectar in a blender. I prefer a smooth sauce, so I would strain it, to remove the raspberry seeds. Store in an airtight container in the refrigerator up to 4 days.
 
2. The chocolate-almond crust- I had some raw almond meal on hand that I made for these
Cookie Dough bites. Lightly grease a 9-in spring form pan with coconut oil. In a food processer, process the almonds, cacao powder, and salt until the almonds look like almond meal. Add the vanilla, agave nectar and coconut oil, and continue to process for 45 seconds until the dough for the crush looks crumbly. Press the crust into the bottom and up the sides half an inch. Chill the crust, for half an hour to an hour before pouring in filling.
 
3. Make the raspberry-chocolate filling: Drain the cashews and place in the blender, with the agave nectar, coconut oil, cacao powder, raspberries, salt and vanilla. He added 1 cup of water, I did not. Puree until smooth. Scrape down the sides of the blender, and pour into chilled crust.
Refrigerate over night until firm to the touch. Store the pie, covered in the refrigerator for up to 6 days.
4. To serve, plate each slice with 2 Tablespoons of  raspberry sauce, fresh raspberries and mini chocolate chips.
 
Have a beautiful weekend!
Until next time!
xo, Christine
 
 
This post contains affiliate links. Purchasing through them help support this website.
Disclaimer: I received this book from Blogging for Books in exchange for this honest review.
 
Sharing this at these parties: